You are here
Frequently Asked Questions
I've run Cash And The City for the first time. What should I do first to start tracking my money?
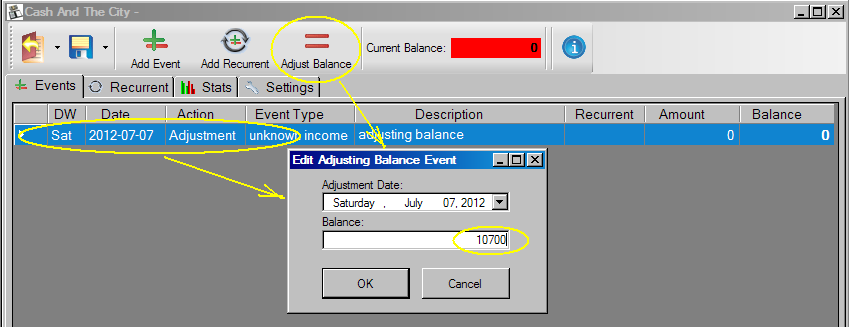
First of all specify starting balance. By default it's equal to zero and defined for current day. The only event you can see in the event list after new file creation is the starting balance definition. You can double click on it or click "Adjust Balance" toolbar button and then change the balance and the date you want to start from.
How can I enter single transaction happened in the past?
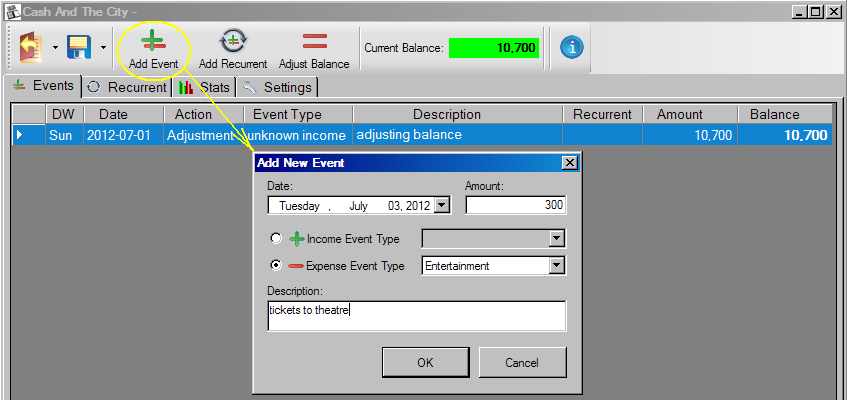
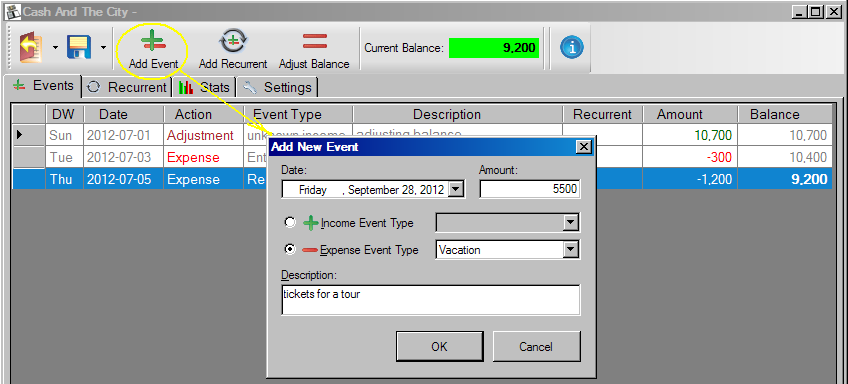
Click "Add Event" toolbar button and specify details.
How can I plan single transaction for a future date?
Click "Add Event" toolbar button and specify details.
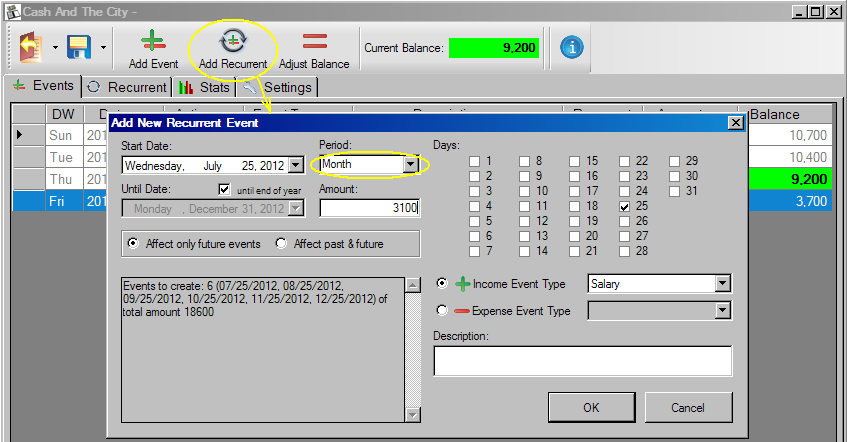
How can I schedule monthly transactions?
Click "Add Recurrent" toolbar button then select "Month" in Period dropdown list, select the date of the first event, and specify other details.
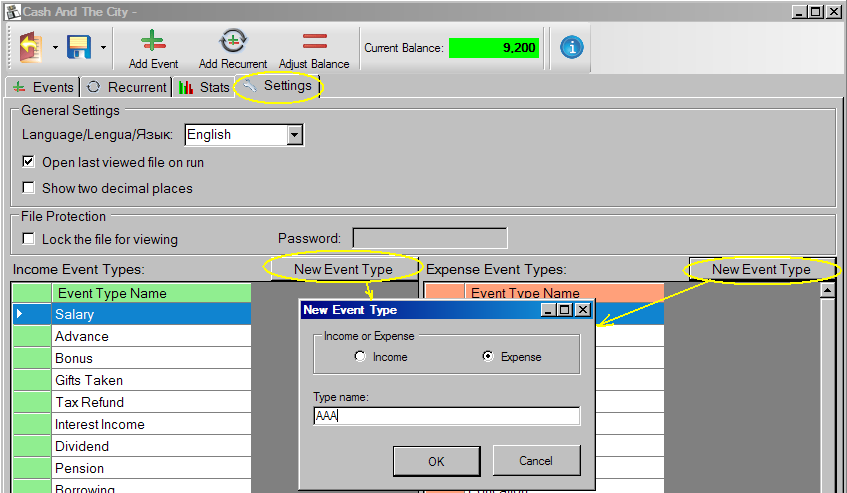
The list of event type does not contain type AAA that I need. What should I do?
Go to "Settings" tab and add another event type by clicking "New Event Type" button.
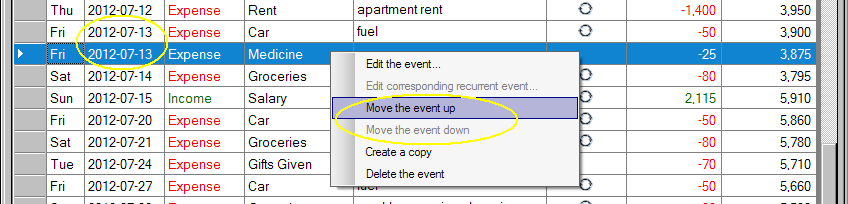
I added several events for the same date but they are displayed in wrong order. Can I reorder them?
Yes. Just drug and drop them.

Or you can use context menu items: "Move the event up", "Move the event down".
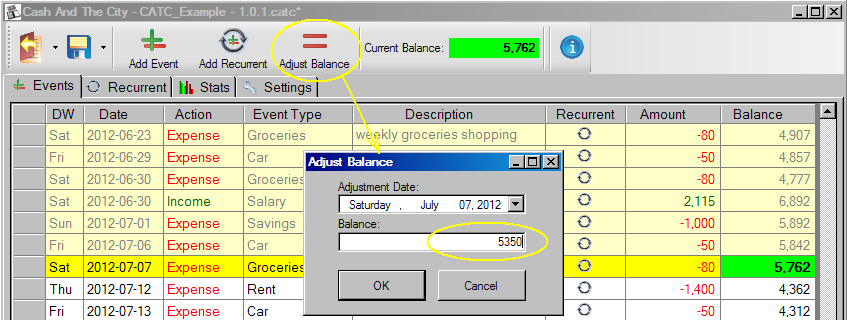
I have not tracked my money for three weeks and now it's rather hard to restore all transactions in details and enter them in the tool. Is there a way to move on tracking my money with correct balance without entering all actual info for the three weeks?
Yes. Click "Adjust Balance" toolbar button and update current balance for today. Then you can continue tracking your money from today. You can enter absent passed events (transactions) for those three weeks later.
How to synchronize my file between Windows application and Android application?
The simplest way - use a free cloud service Dropbox.
Here are steps how to do it:
- Windows: Install Dropbox on you Windows computer from site: www.dropbox.com.
- Windows: Place your CATC file into Dropbox folder on your Windows computer.
- Windows: Open and edit your CATC file only in that location.
- Android: Install Dropbox on you Android phone from Google Play: Dropbox for Android.
- Android: Find your CATC file in the installed Dropbox application and mark the file as available offline.
- Android: Open and edit your CATC file only from the Dropbox application by tapping the file from Offline files screen. And don't forget to save your CATC file when you are done editing it (through main menu item "Save").
That's it.
Alternative way.
You can use any popular free (or payed) cloud service like Dropbox, or Google Drive, or One Drive or similar ones along with FolderSync app on your Android phone. Steps:
- Windows: Install client application of a cloud service on your Windows computer (if it's not already installed).
- Windows: Place your CATC file into configured cloud folder.
- Windows: Open and edit your CATC file only in that location.
- Android: Install FolderSync app or FolderSync Lite app on you Android phone from Google Play.
- Android: In FolderSync app configure folder pair for syncing files in your cloud folder with a local folder on your phone.
- Android: Open and edit your CATC file only in that location.
Best regards.
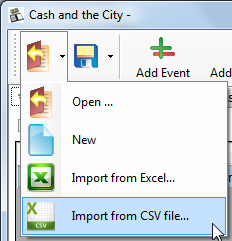
How to import transactions data from custom Excel or CSV file?
- Open CATC file you want to import spreadsheet to or create a New one (and you can delete the only balance adjustment event if you don’t need it).
- Then use the menu items Import from Excel or Import from CSV file:
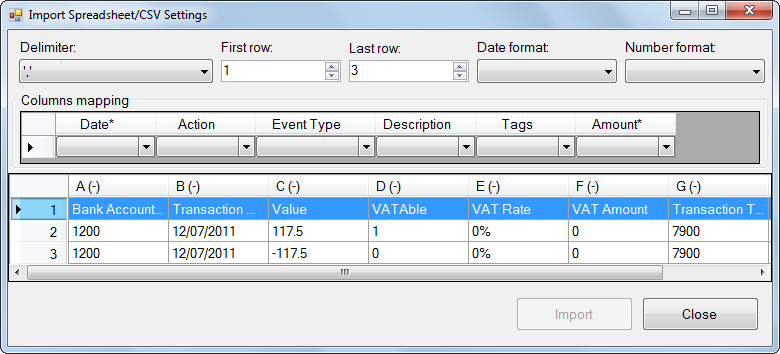
- Wait until the dialog Import Spreadsheet/CSV Settings is displayed:
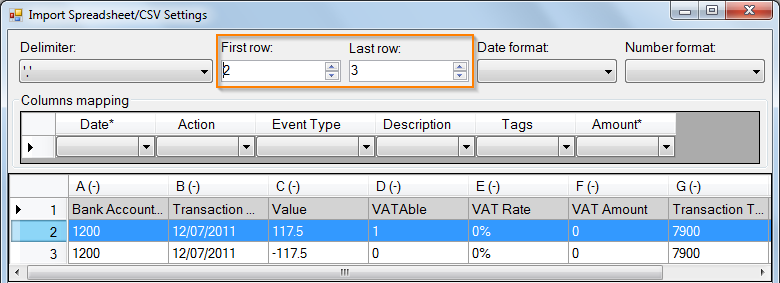
- Review the grid below to ensure that the cells from the file are correctly read.
- Adjust First row and Last row. Only valuable rows should be in this range. Headers or empty row should be outside the range:
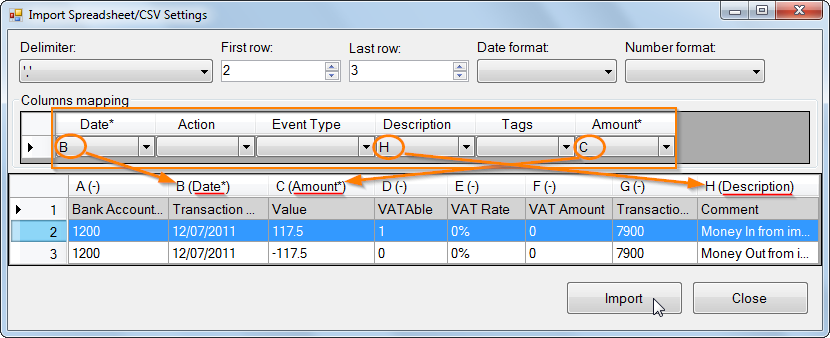
- Make Column mapping (map columns from your file to values needed for Cash and the City). You should map at least Date and Amount columns:
- If your XLSX or CSV file was created with different to current Windows culture settings then you may need to specify Date format and Number format:
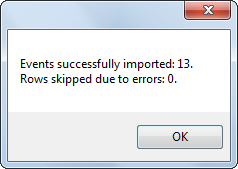
- Click Import. You’ll see message box with statistics:
- Now your spreadsheet/CSV data is inside Cash and the City.
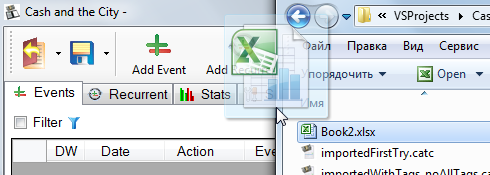
Also you can drag and drop you XLSX or CSV file to the toolbar:
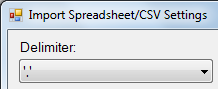
- For CSV: you can change delimiter symbol in the top left drop down box:
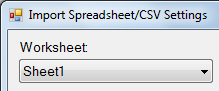
- For Excel file: you can change Worksheet in the top left drop down box:

Have more questions? Ask them in our forum and we will answer as soon as we can.